Programming the Engine Control Module (ECM) of Chevrolet with RLink J2534 and SPS2 Software
Pre-Programming Preparation:
I. Preliminary Requirements
PC Setup: Prepare a computer pre-installed with OE software and ensure it is fully charged.
- Tip: It is recommended to keep the PC connected to a power source throughout the programming process to prevent interruptions caused by power loss.
Network Connection: The computer must be connected via a wired network to ensure a download speed of ≥5MB/s.
- Note: Some ECU data files are large; excessive network latency or disconnection will directly cause programming failure.
Vehicle Power: Connect the vehicle to a dedicated stable voltage power supply (programming power supply) and maintain the voltage between 13.2V and 14.5V.
- Warning: Voltage fluctuations can cause programming failure. Ensure stable power supply.
- Parking: Park the vehicle on level ground to prevent the risk of rolling. An inclined surface may lead to accidents during programming.
II. Pre-Programming Inspection
- Circuit Check: Verify that the ECU power supply and grounding circuits are normal. Confirm that the ECU information to be programmed matches the current vehicle's ECU information exactly.
Refurbished ECU: If programming a refurbished ECU, strictly follow the manufacturer's operating guidelines.
- Some refurbished ECUs (e.g., anti-theft related) may fail OEM software verification.
- Used ECUs may need to be wiped (cleared of data) before use; otherwise, programming will fail.
- Recommendation: It is recommended to use a brand new ECU for programming, and a stable voltage power supply must be connected during the process.
III. Programming Procedures
- Follow Instructions: During programming, carefully read the prompts within the OEM software and execute steps strictly. Do not perform unauthorized operations.
IV. Troubleshooting Programming Failures
- Initial Check: If programming fails, first check the vehicle status and the connection of the diagnostic equipment.
- Retry Method: If the status is normal, it is recommended to let the vehicle sleep for 30 minutes before retrying. Power cycling or sleep mode can clear cached error data and improve the success rate of the retry.
- Display Issues: If the vehicle instrument cluster fails to display information correctly after a failure, it is recommended to re-program immediately. Do not disconnect the equipment or power, and do not turn off the ignition.
⚠️ Important Note: Please try to use a brand new ECU for programming, and ensure a stable voltage power supply is connected during the process.
Take out the RLink device, connect it to the vehicle’s OBD diagnostic port and the computer’s USB port respectively, and ensure a secure connection.
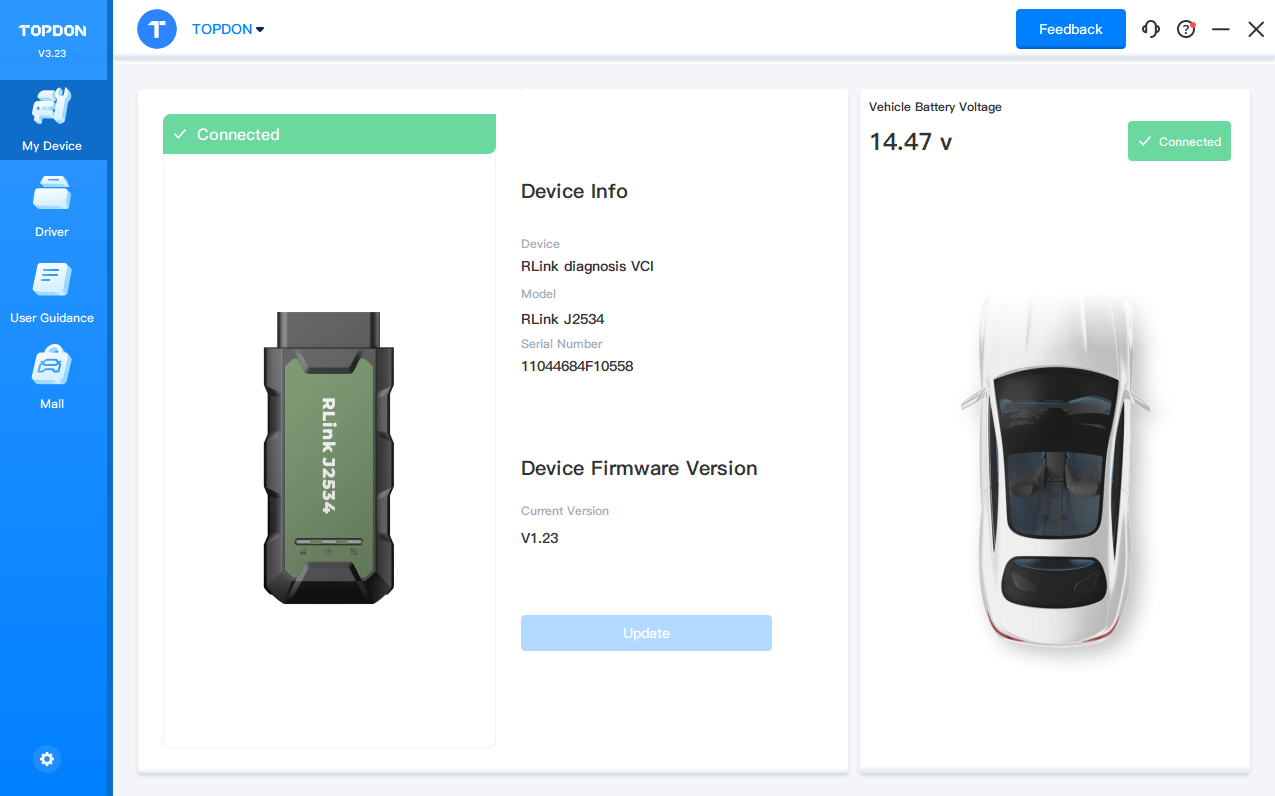
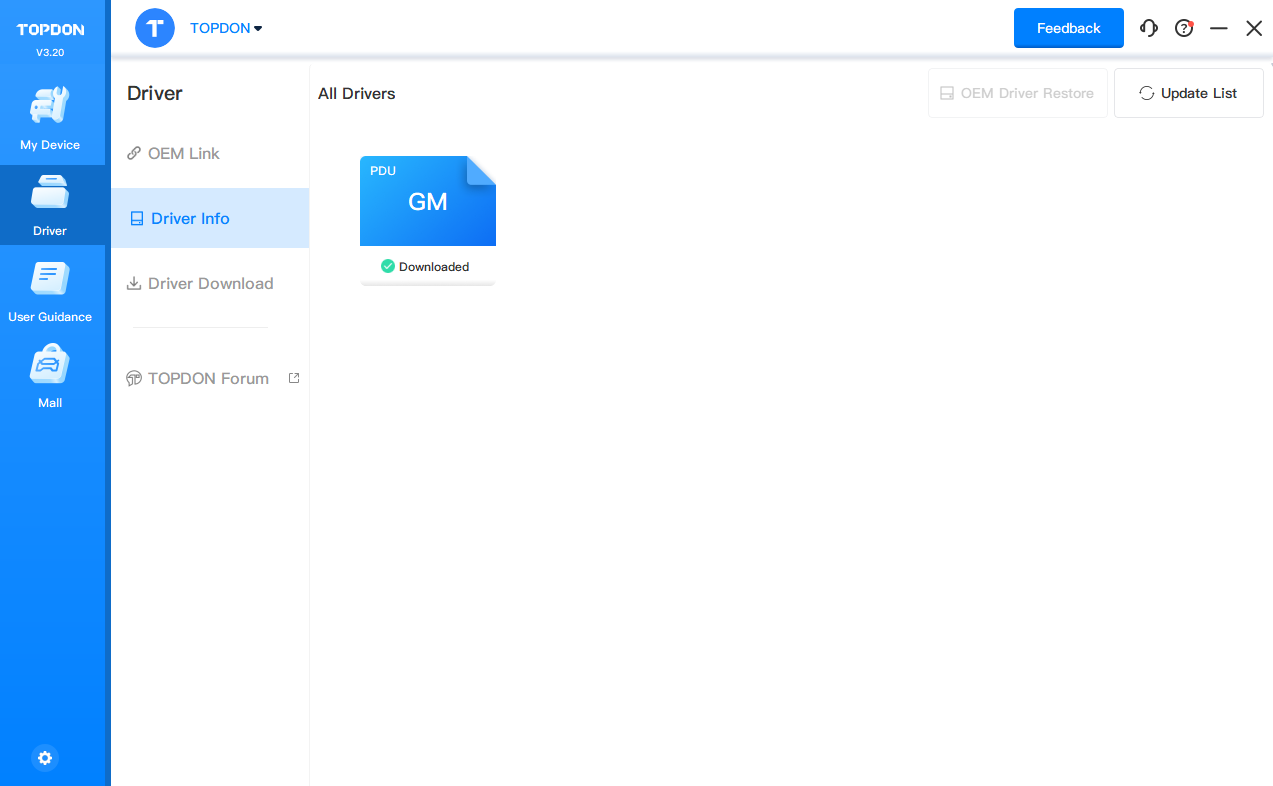
After the device is properly connected, launch the RLink Platform software. Confirm the vehicle connection status via the connection information in the platform and verify that the driver has been downloaded.
Note: Before programming with SPS2 software, it is recommended to log in to your RLink Platform account to check for software or firmware updates. If updates are available, install them before proceeding with vehicle programming.
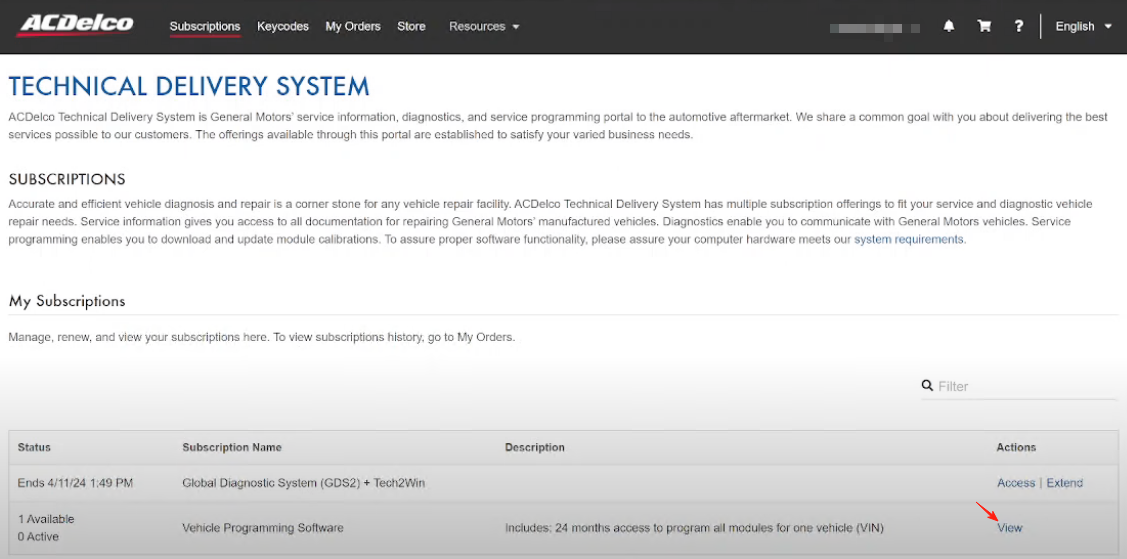
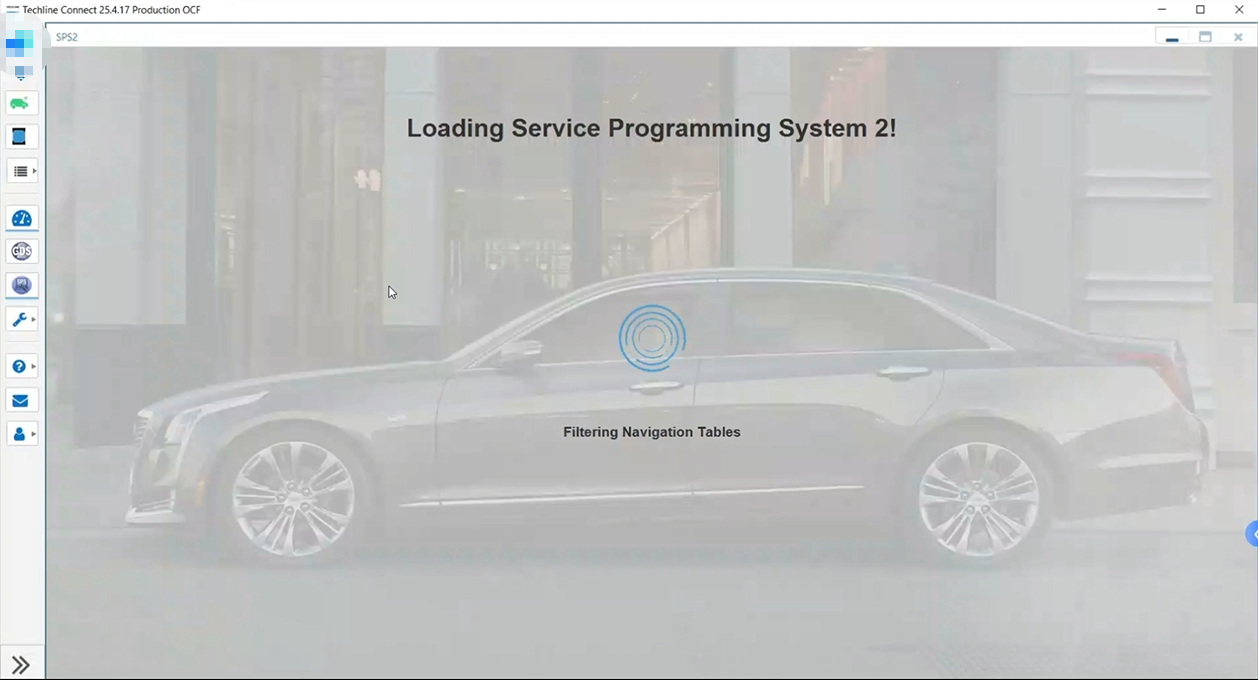
Open the GM official website and click [View] to run the subscribed SPS2 software.
Note: The software description information will be dynamically updated; the final version shall prevail as published on the GM official website.
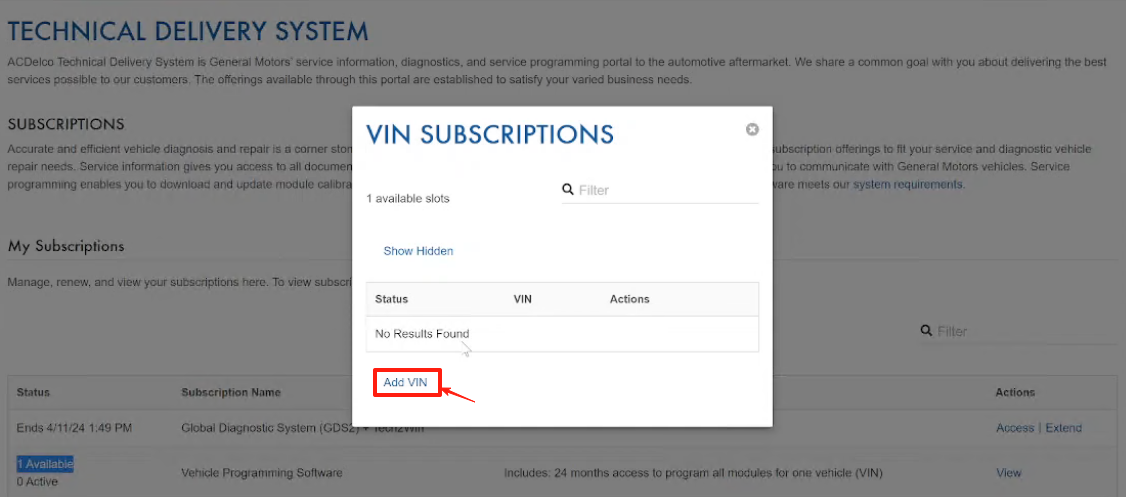
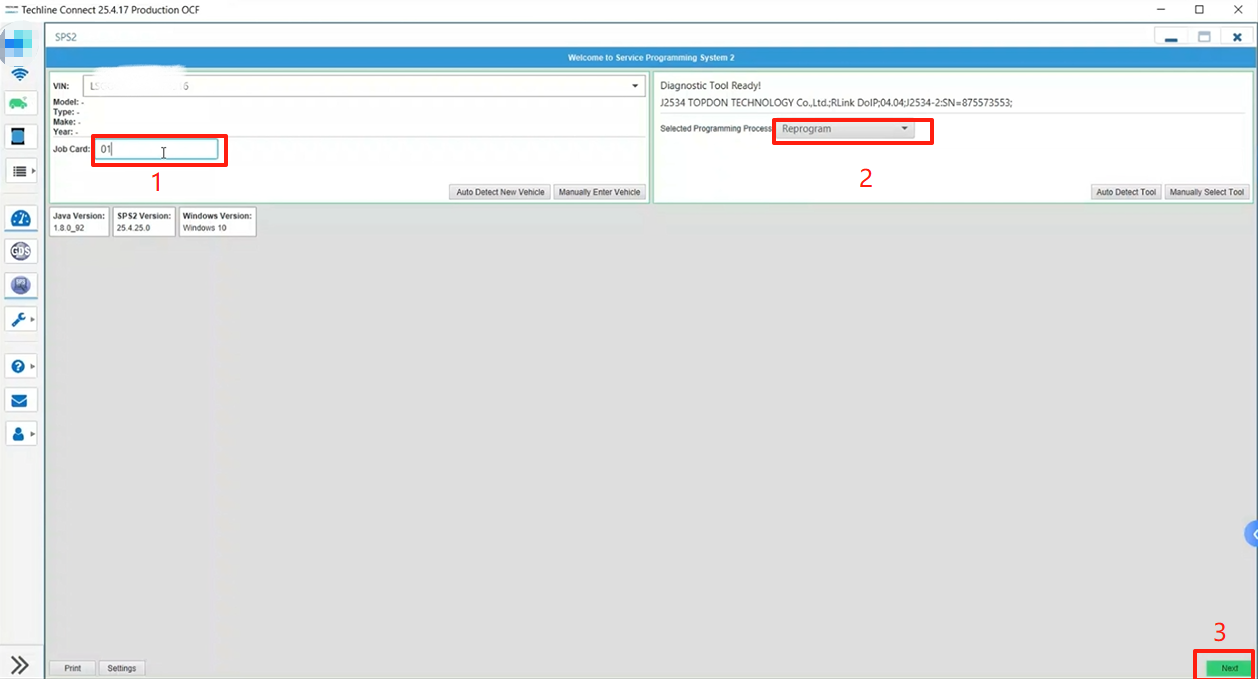
Click [Add Vin] to enter the VIN code of the vehicle to be programmed.
Note: After binding the vehicle, the subscribed programming permission will be linked to this specific vehicle and cannot be used for programming any other vehicles thereafter.
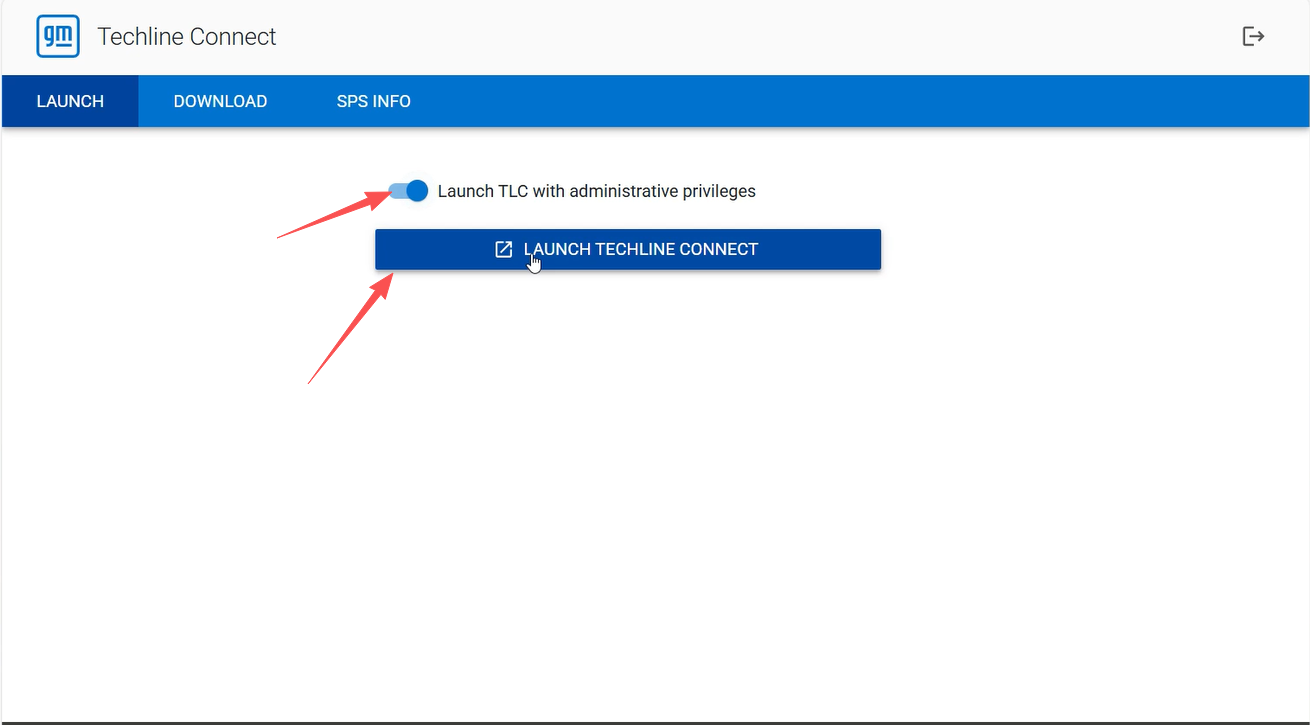
Select [Launch TLC with administrative privileges] and click [Launch Techline Connect] to start the Techline software.
Important Note: If the relevant Techline software is not installed, the system will automatically initiate the installation process after launching Techline. Since the installation may take a considerable amount of time, ensure sufficient advance time is reserved to complete it and guarantee smooth subsequent operations.
After entering the diagnostic software homepage, click [Connect Vehicle], then select the corresponding driver mode.
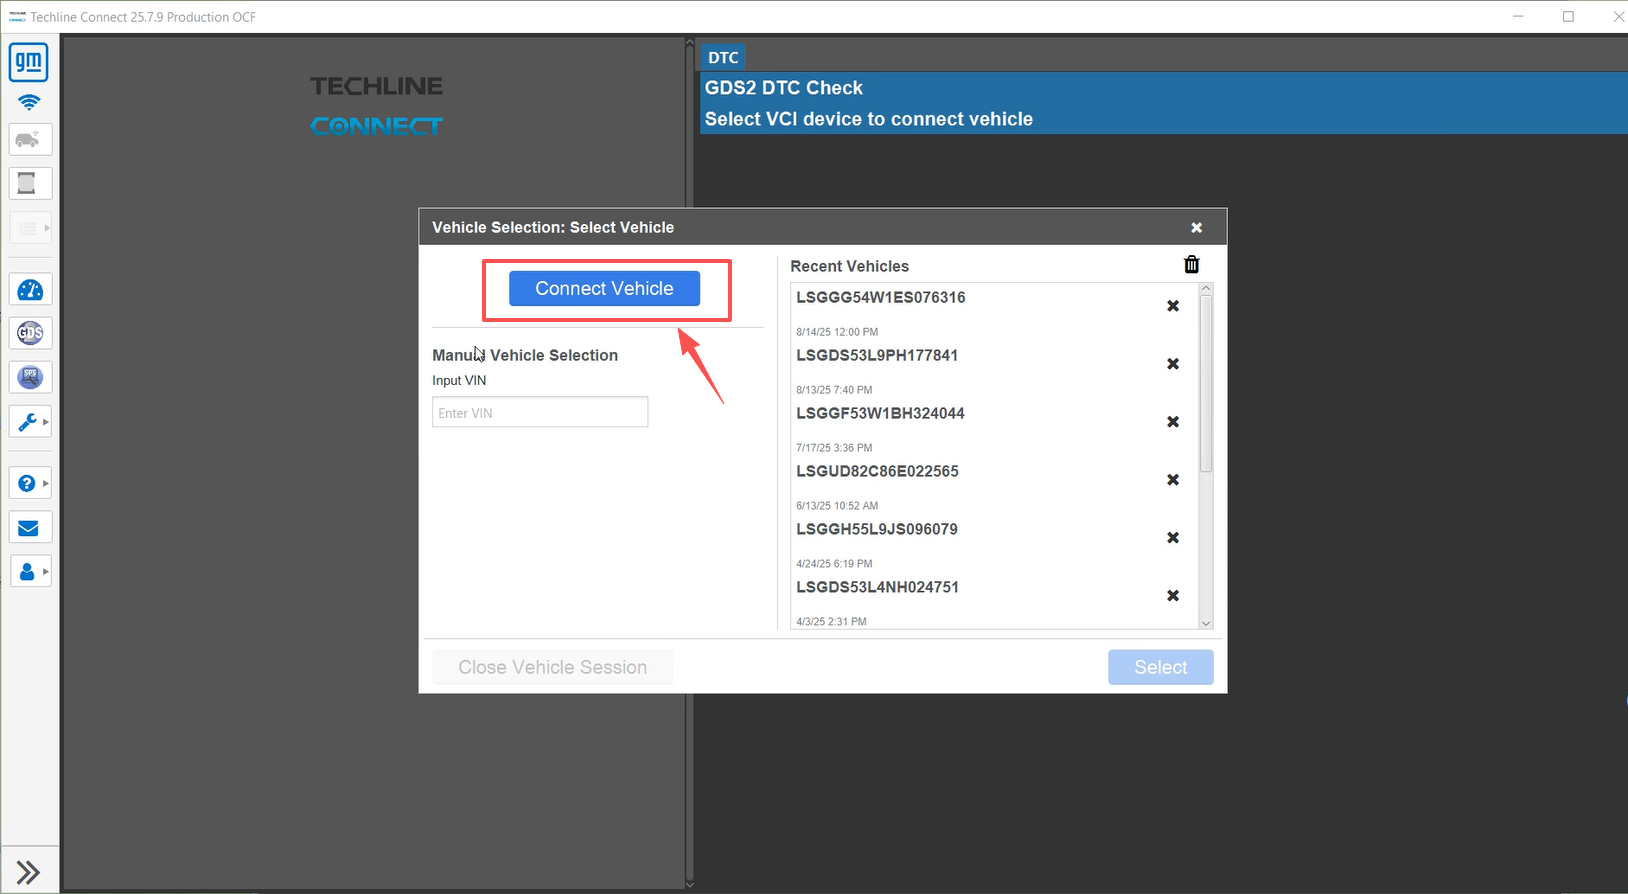
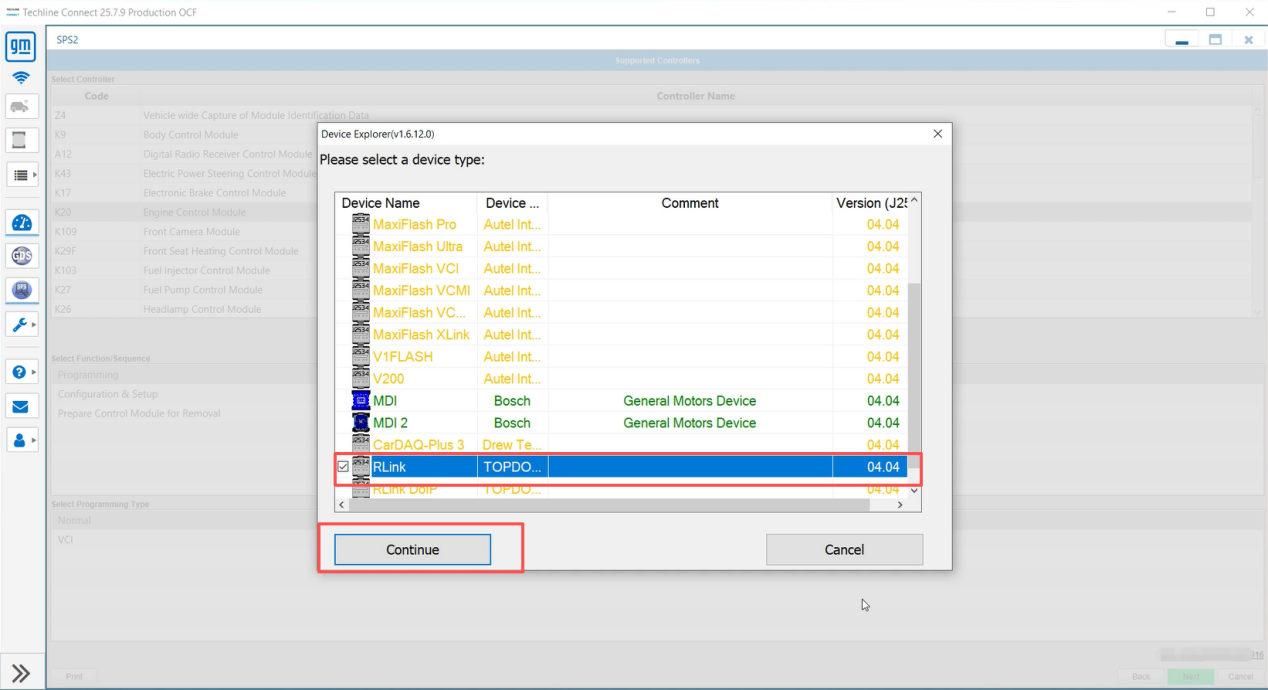
Choose either [RLink] driver mode or [RLink DOIP] driver mode from the options (both modes are compatible with RLink device connection), and click [Continue] after selection.
Important Note: For diagnostic operations on vehicles with the DOIP protocol, [RLink DOIP] driver mode must be selected exclusively; otherwise, normal connection cannot be established.

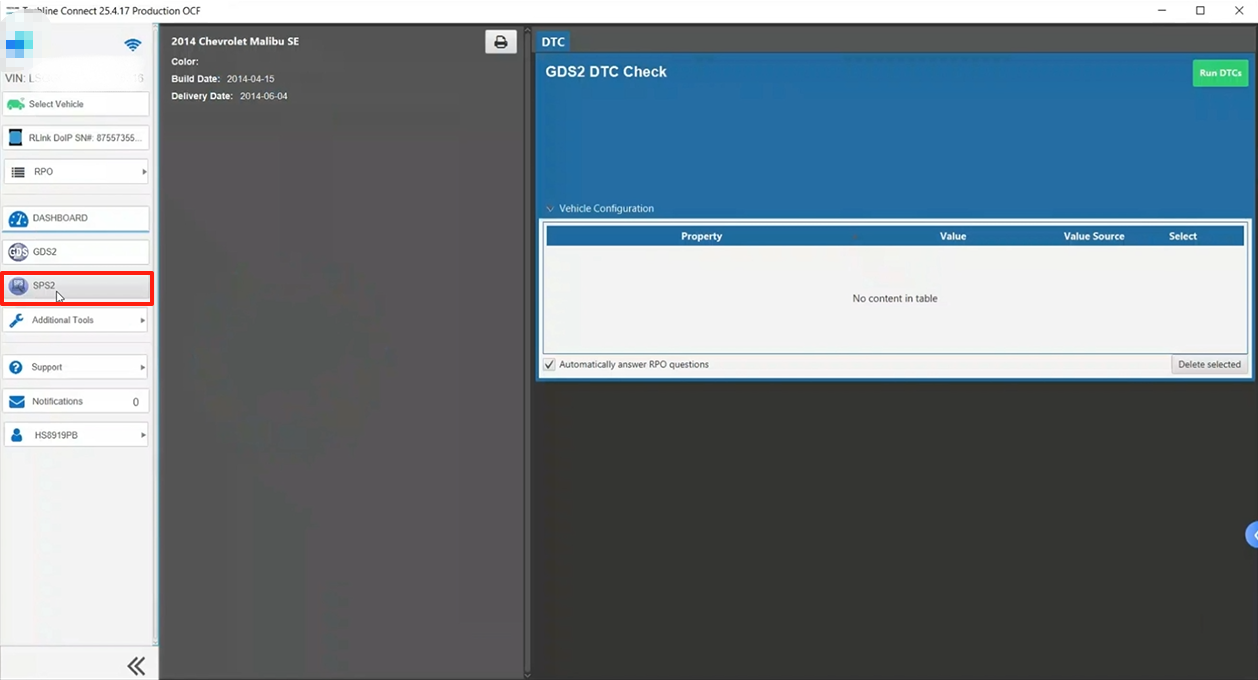
Once the RLink VCI successfully connects to the vehicle, the system will automatically read the relevant vehicle information. After carefully verifying the accuracy of the information, click the [SPS] icon to enter the programming operation page.
Before accessing the SPS programming software, the SPS software will automatically start a verification program to compare and validate the vehicle information against the server information.
Important Note: The verified vehicle information must be consistent with the subscription information; otherwise, reading or verification failure will occur. During verification and subsequent programming, maintain network stability and prioritize a wired network to ensure smooth programming.
After confirming the programming requirements, select [Reprogram] mode and click [Next] to proceed to the next step.
Important Note:
- Some software versions include a work order filling function. If this option is not available, no filling is required—directly select the programming mode.
- The mode selection must accurately match the vehicle condition: select [Reprogram] mode if the ECU has not been replaced, and [Replace and Reprogram] mode if a new ECU is installed. During the subsequent download of programming files, the SPS2 software will retrieve the relevant files based on this selection to reduce the risk of programming failure.
Select [K20 Engine Control Module] and click [NEXT].

Engine programming may require reconfirming the VCI device connection. Select the RLink mode and click [Connect].
Before programming, confirm that the vehicle’s diagnostic power supply and RLink VCI connection are normal, then click [Start Programming].
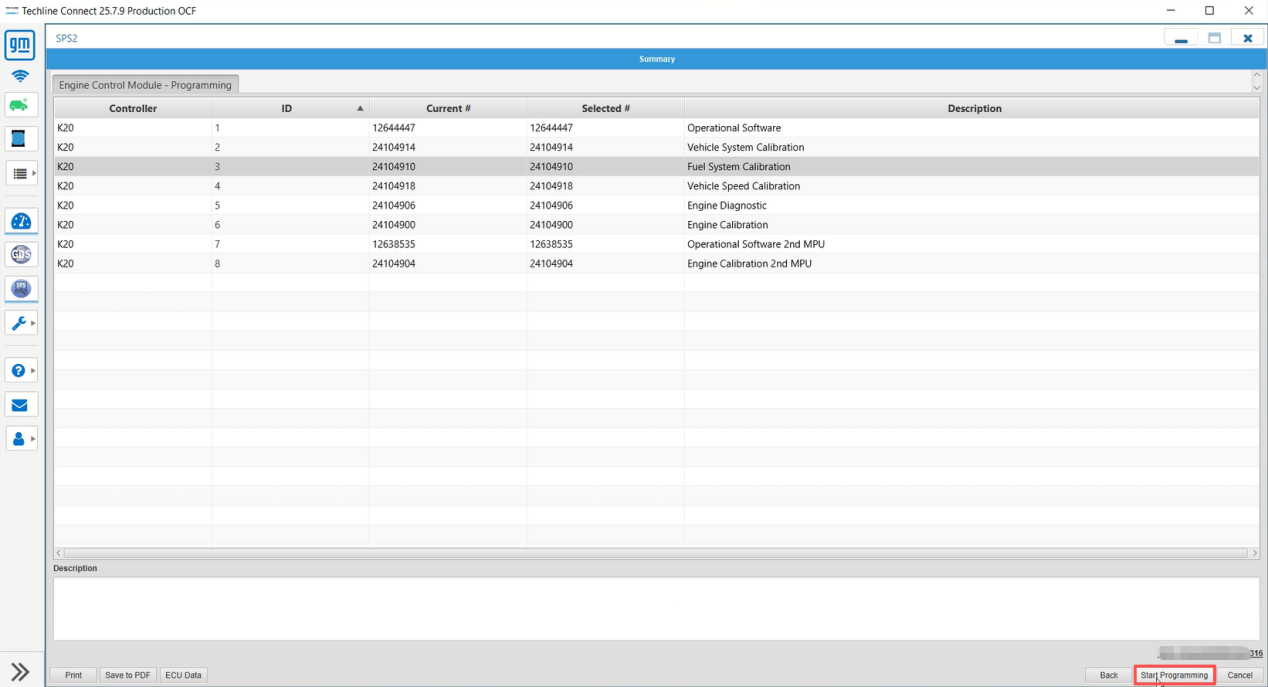
Programming in Progress
Prompt: Do not exit the software midway during programming; otherwise, the ECU may be damaged.
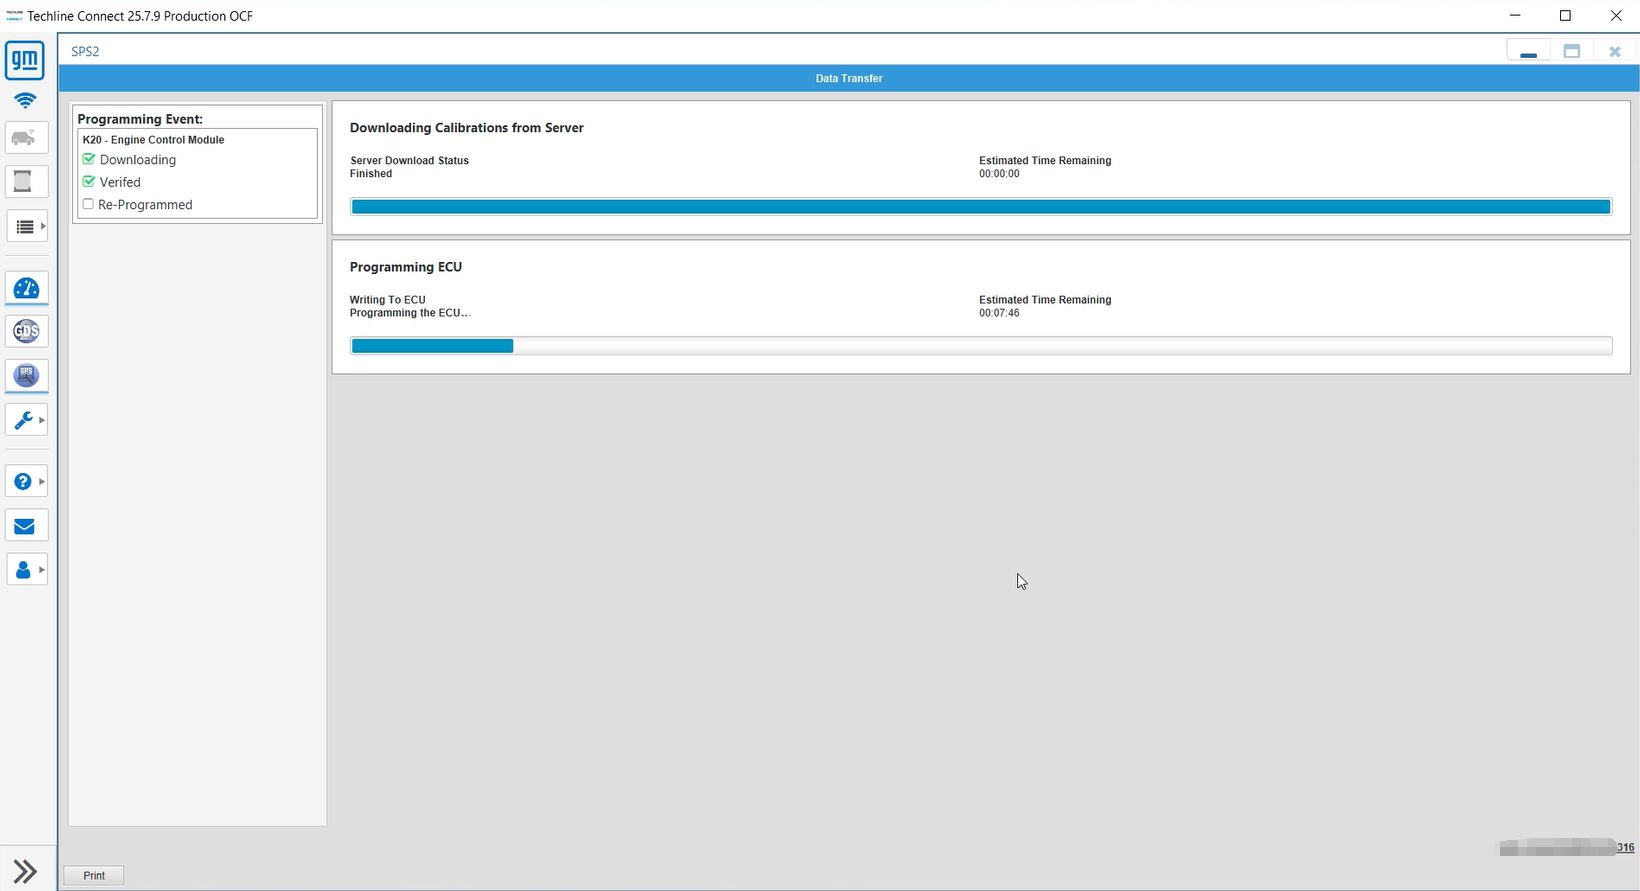
Once the engine control module programming is completed, click [OK].

After programming, click the [GDS2] icon to enter the diagnostic system and match the engine control module.
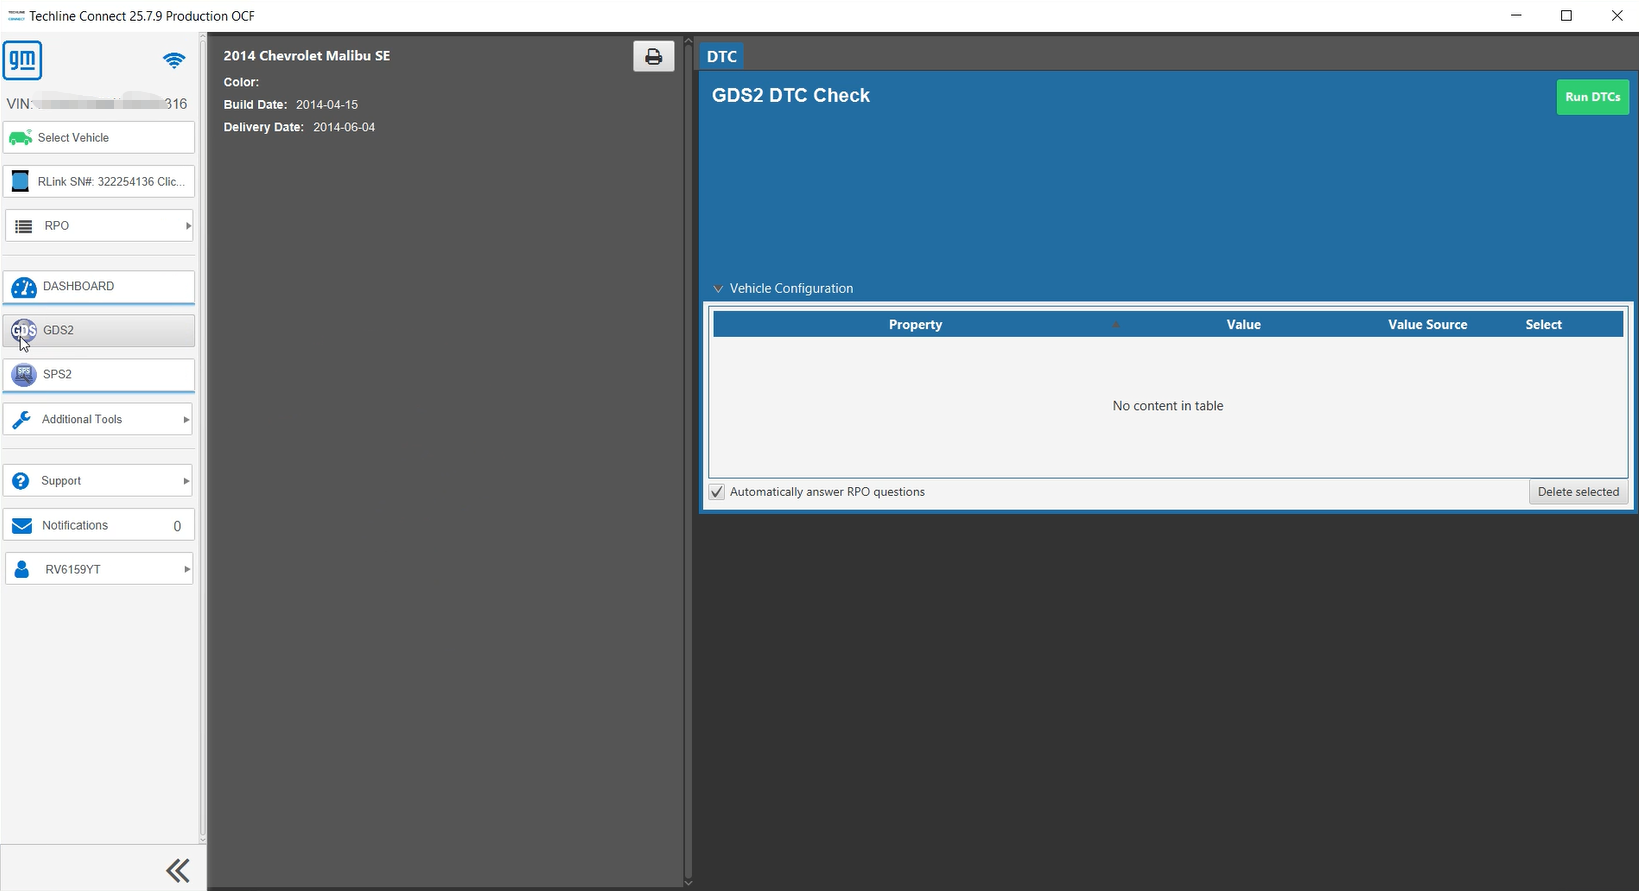
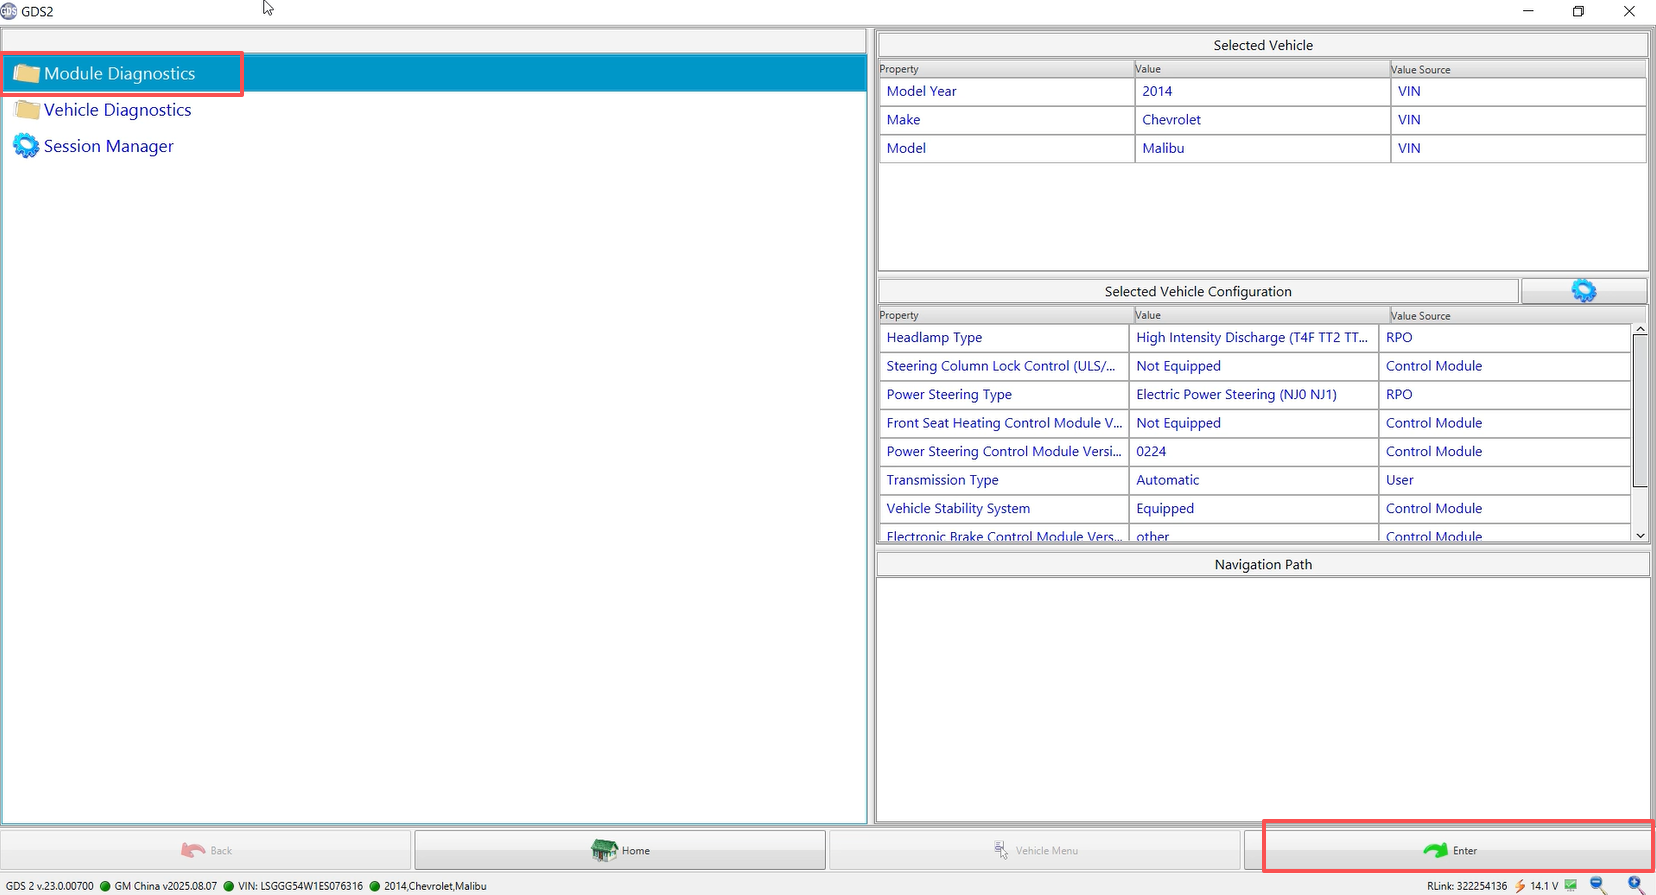
Confirm the vehicle information is correct and click [Enter].

Select [Module Diagnostics] and then click [Enter].
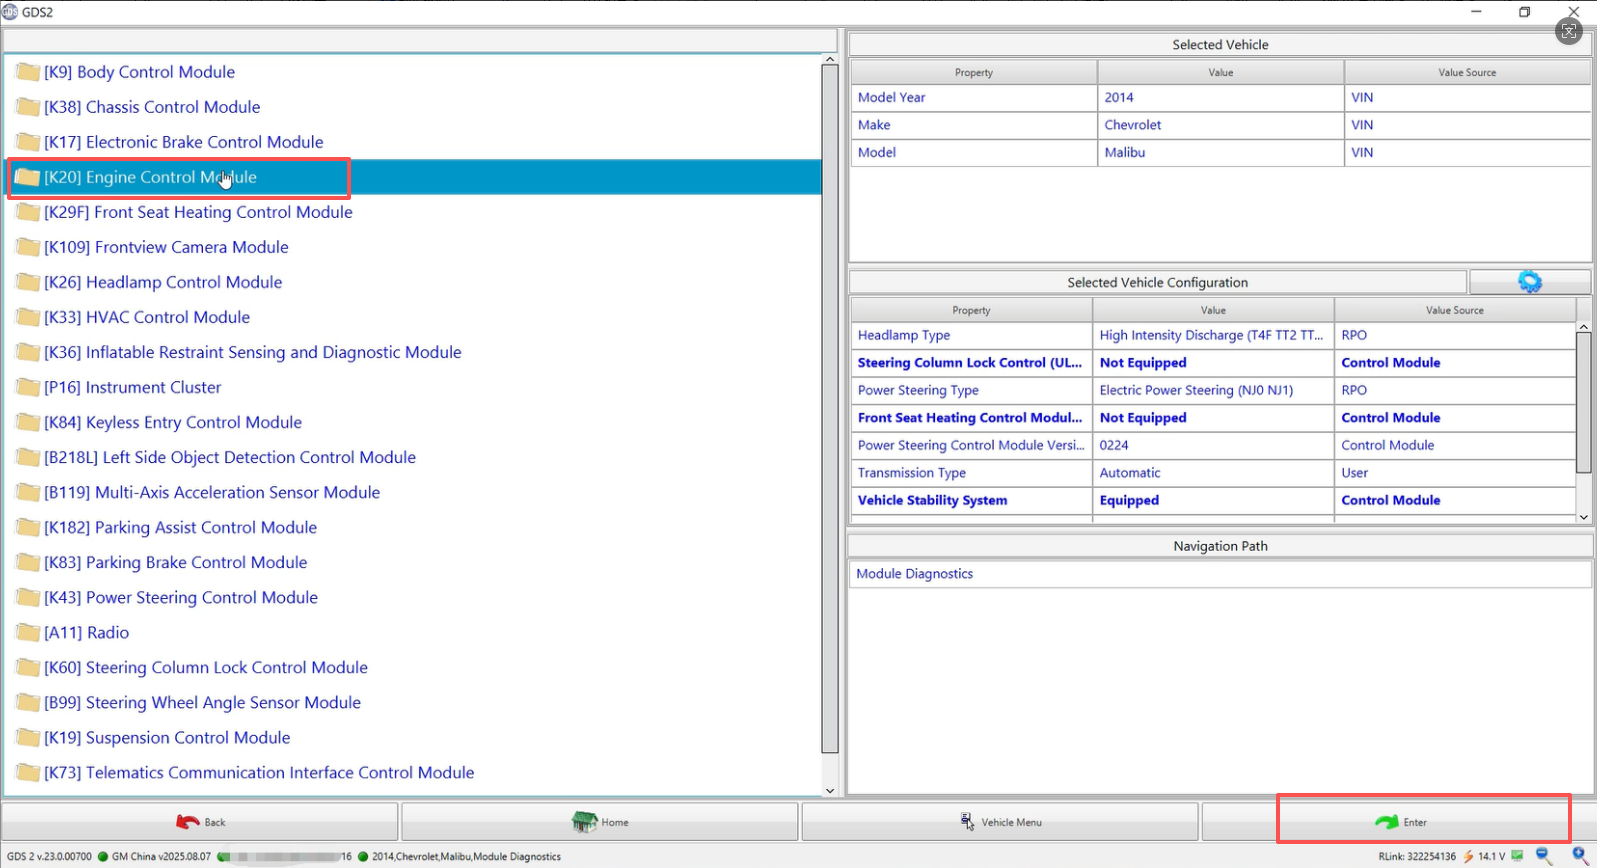
Choose [K20 Engine Control Module] and click [Enter] to proceed to the next step.
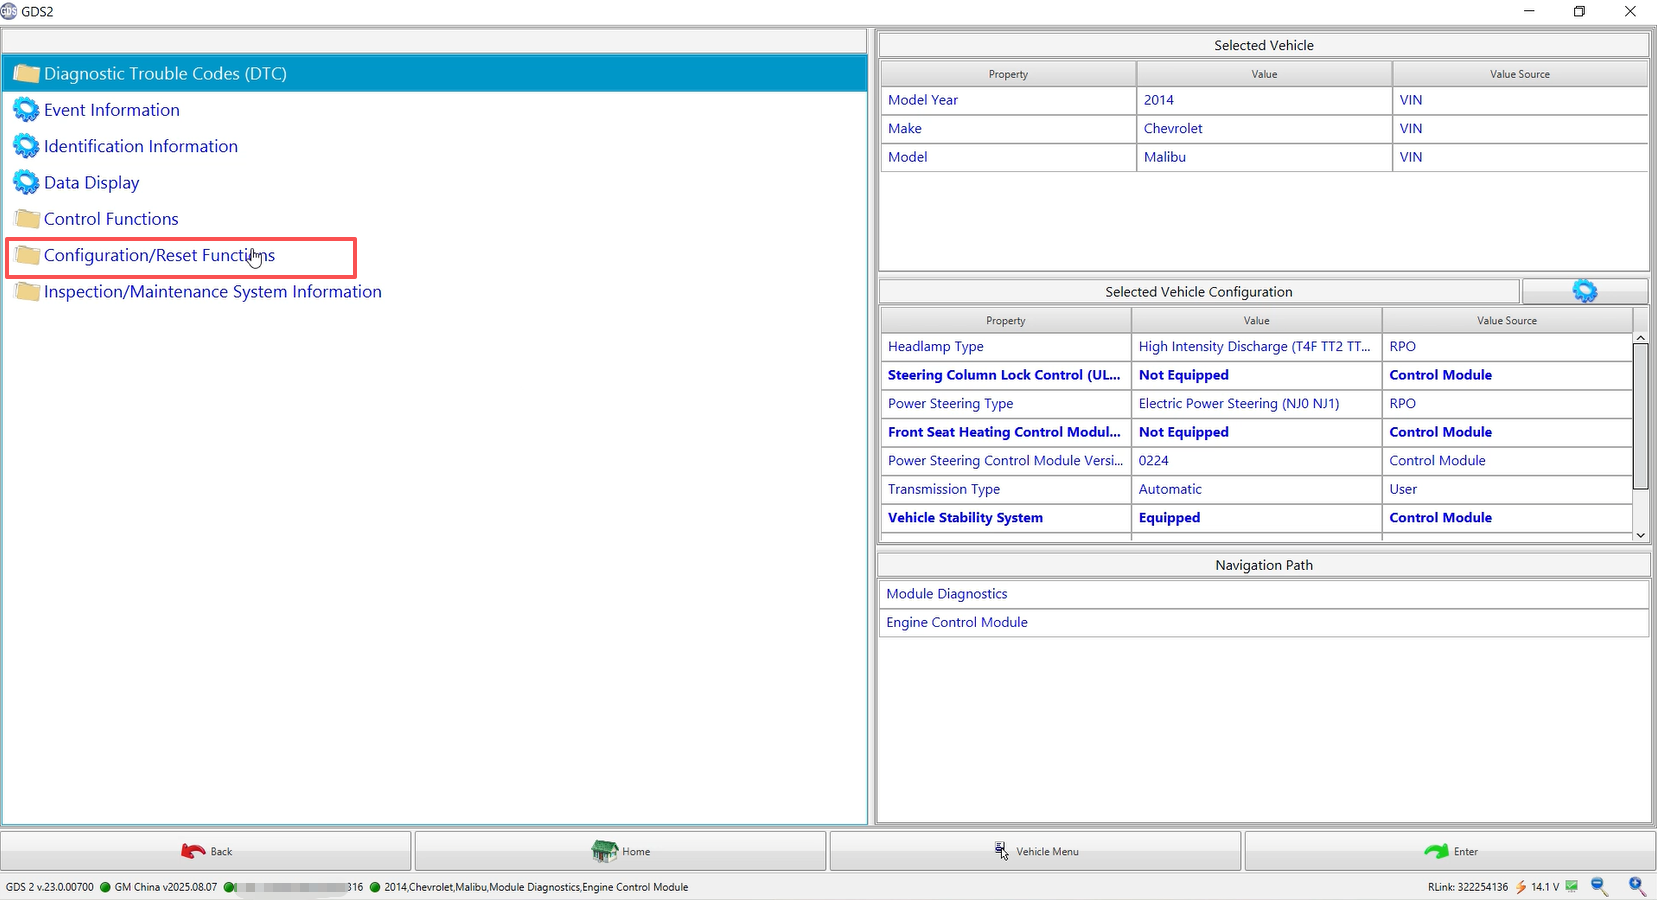
Directly click [Configuration/Reset Functions] to perform data matching for the engine control module.
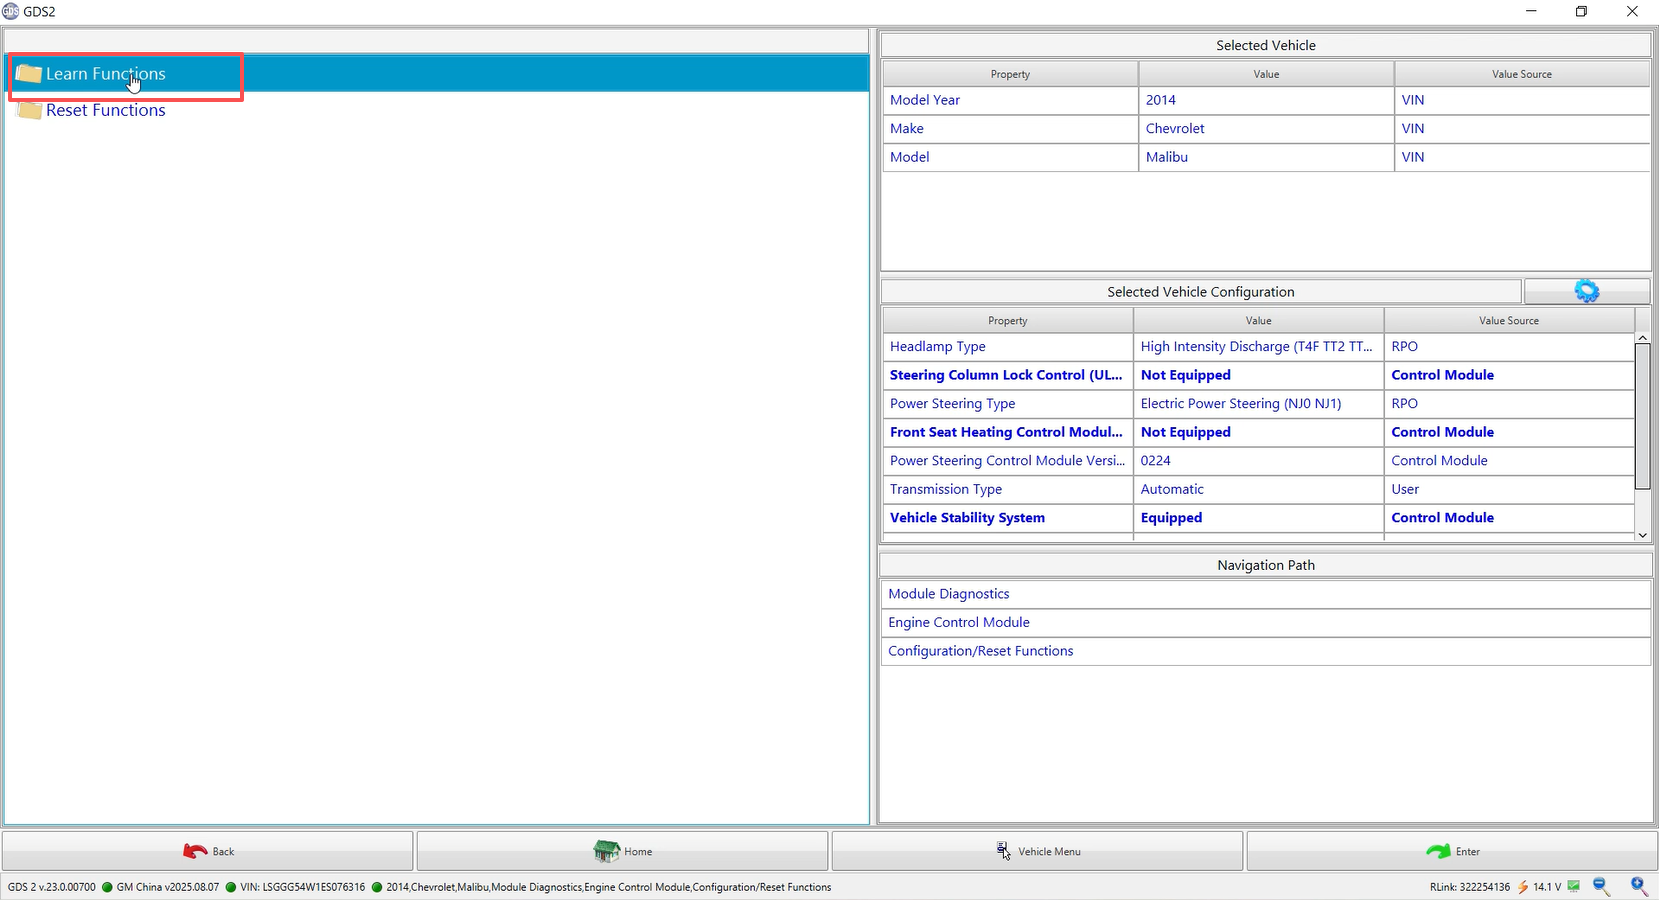
Click [Learn Functions] to access the sensor learning menu.
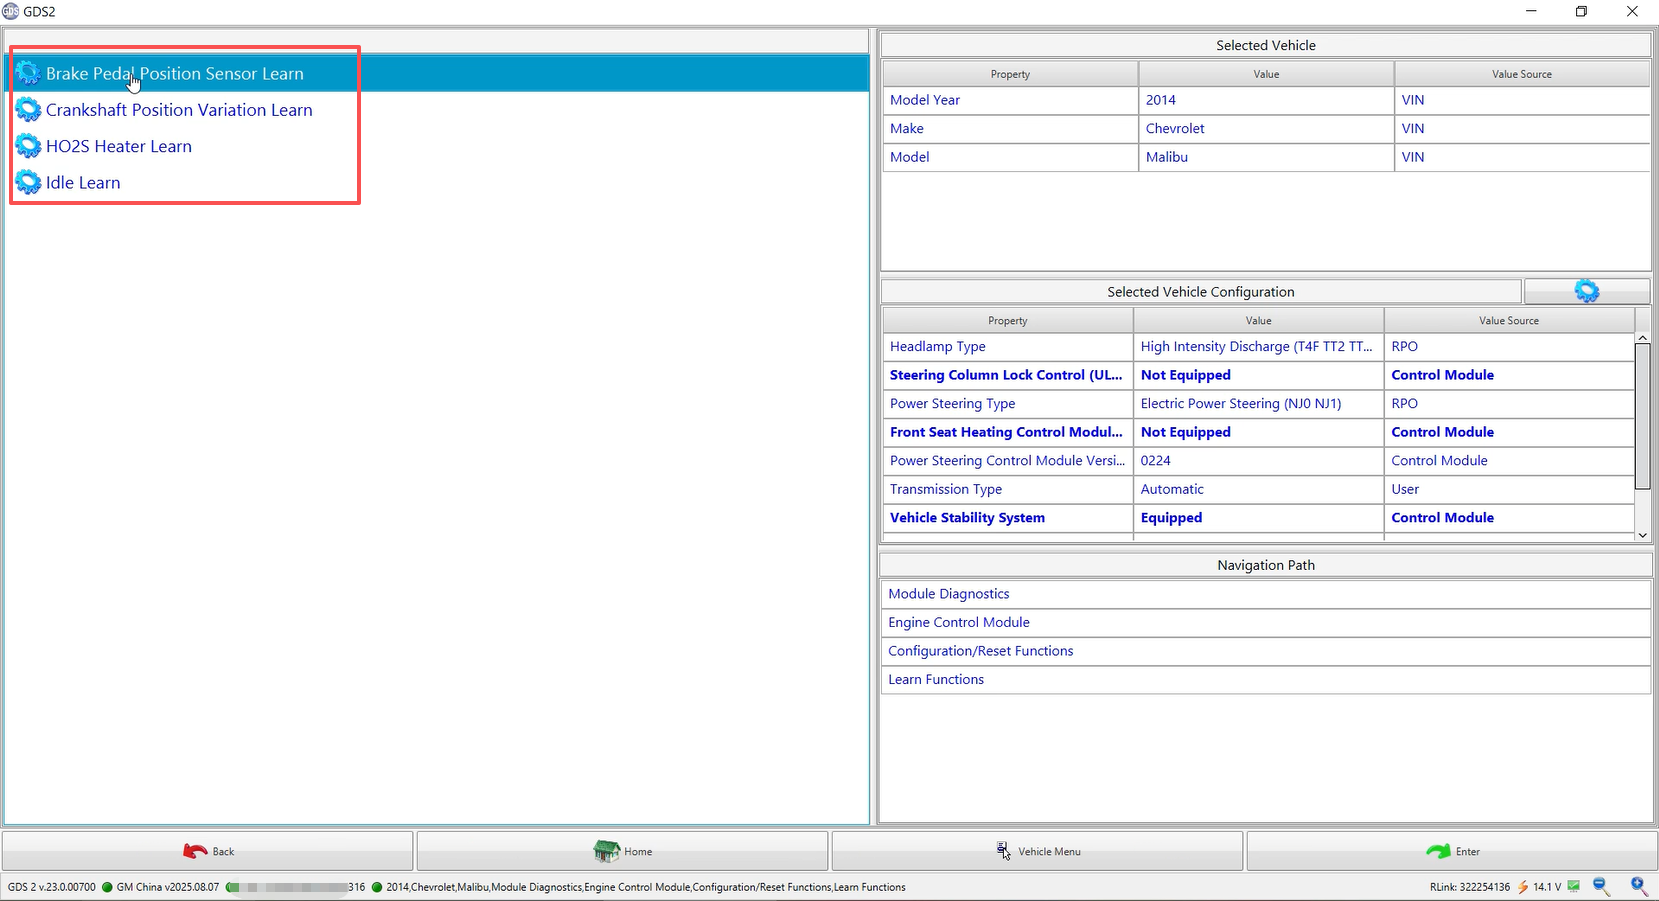
Match the sensors displayed in the software.
Note: Before matching, confirm that the sensors and their wiring are in normal condition; any faults will prevent successful matching.
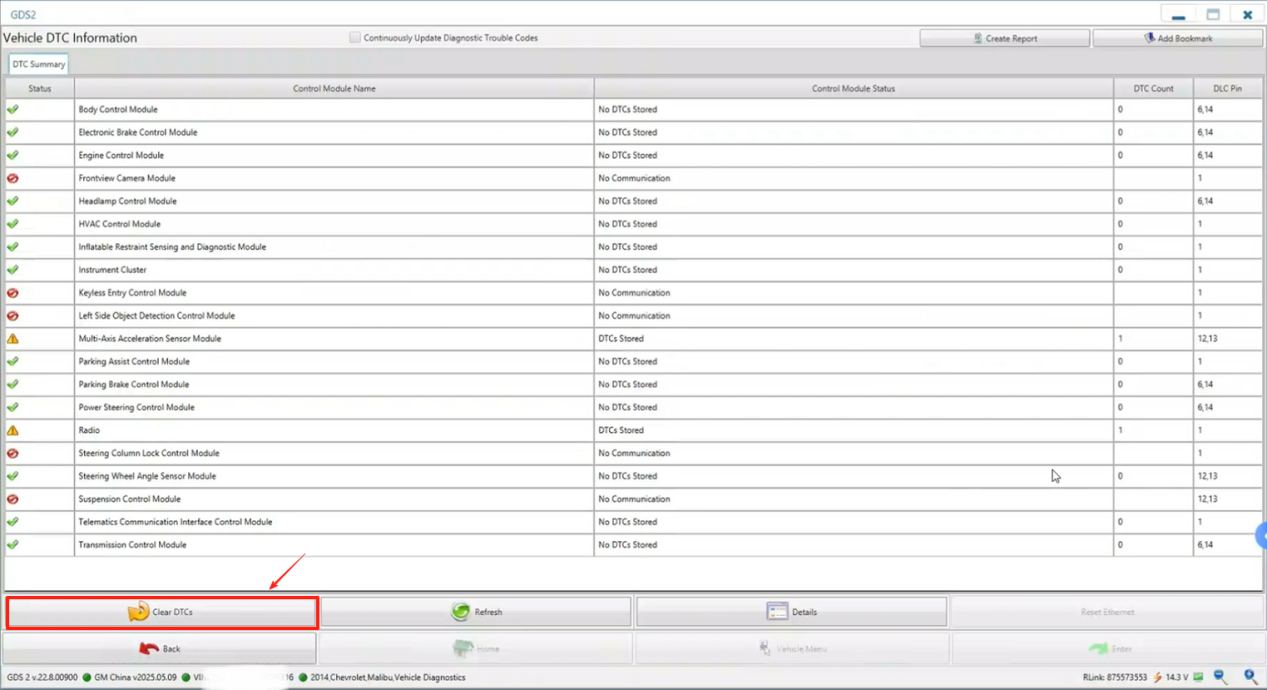
After matching is completed, clear all fault codes and conduct a vehicle road test.